Holiday Trees
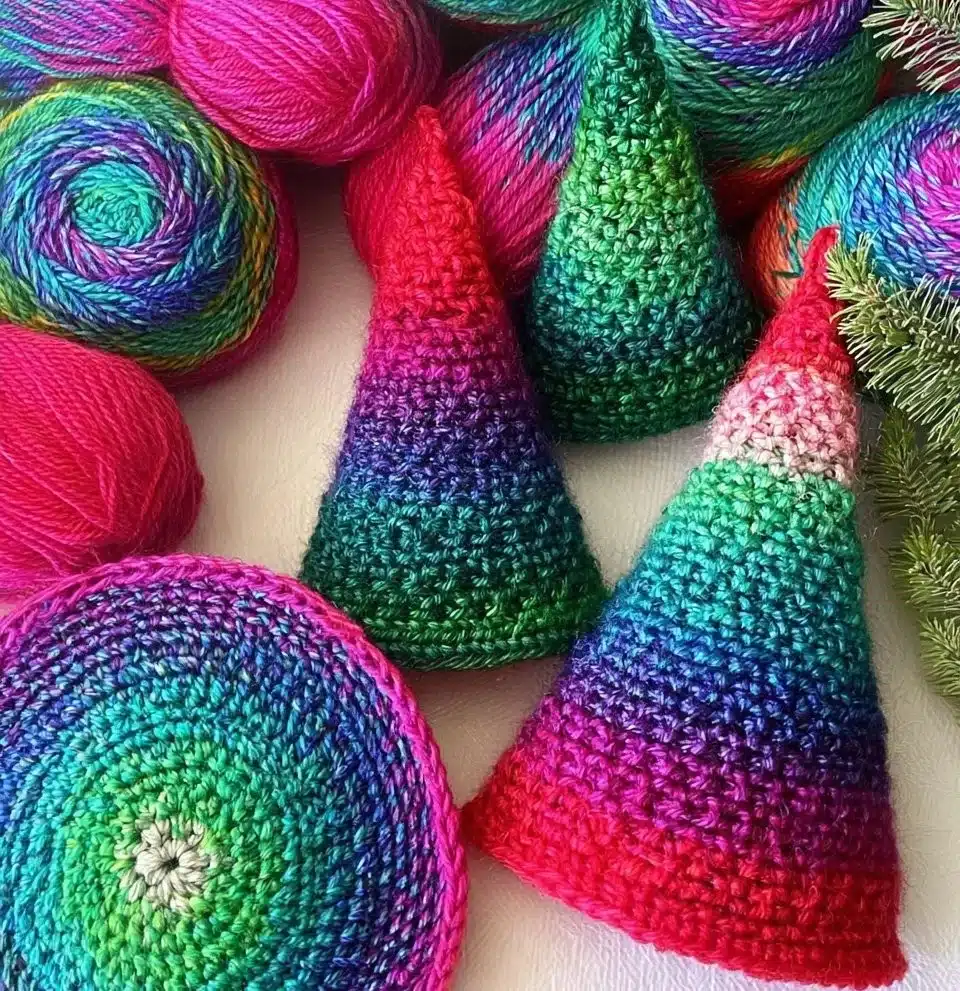
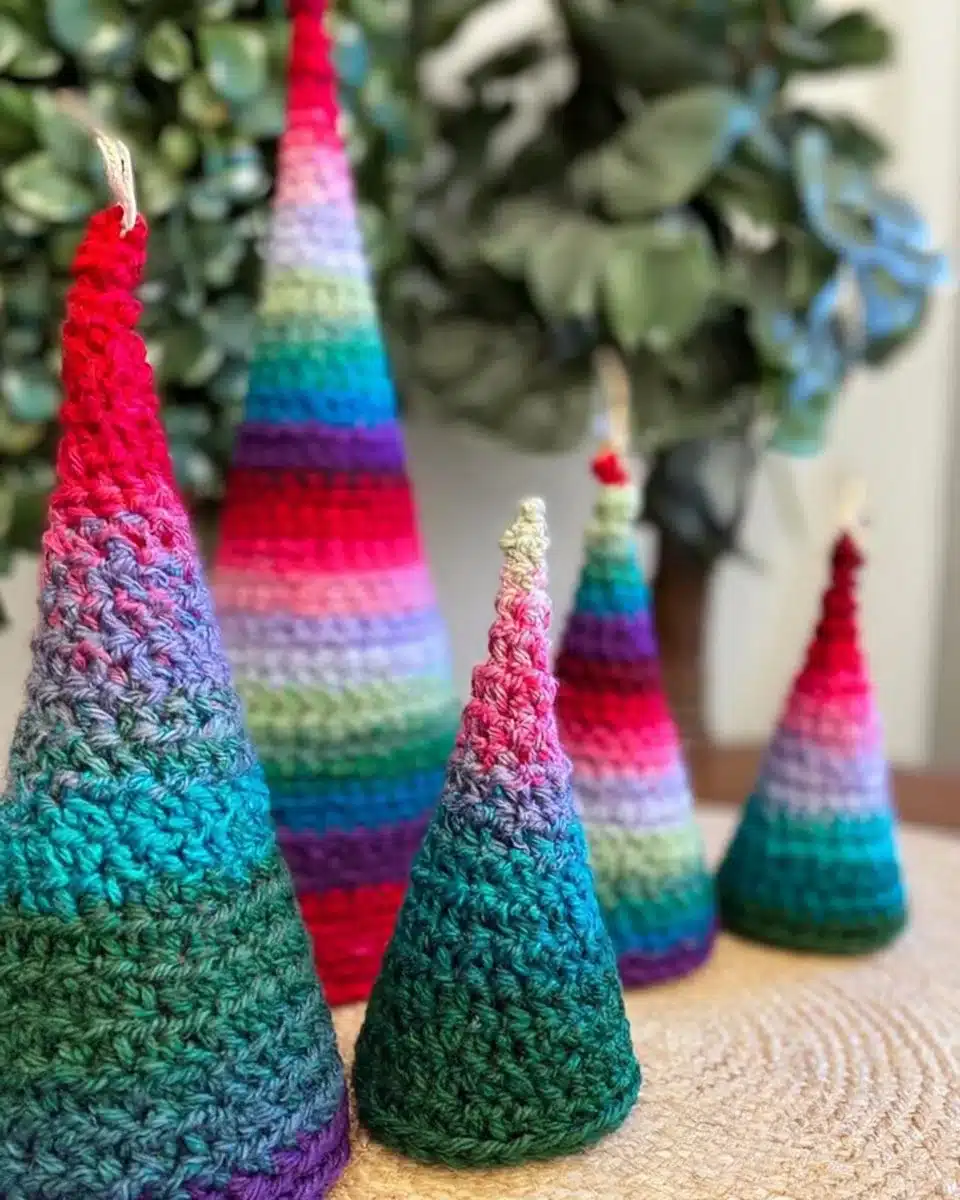
The holiday season is upon us, and what better way to celebrate than by bringing a touch of whimsy into our homes with crochet? The Merry & Bright Holiday Trees Crochet Pattern embodies the spirit of the season, transforming simple yarn into delightful mini trees that can brighten any room. Unlike standard crocheted items, this pattern allows for a playful, three-dimensional experience, making every stitch a joyful part of the holiday charm.
In this free pattern, I’ll guide you through each step, ensuring that even if you’re a first-timer, you’ll feel empowered and excited. Gather your yarn and crochet hook, and prepare to create something truly special this holiday season!
Why This Variation Feels Different
The Merry & Bright Holiday Trees Crochet Pattern offers a layered, textured appearance that sets it apart from more traditional crochet items. By using simple increases and decreases, you achieve a series of tree-like shapes that create a charming and festive display.
What makes this variation worth trying:
- Unique Aesthetic: The three-dimensional trees bring an artistic touch to your décor.
- Interactive Crafting: Enjoy the process of stuffing and shaping each tree, making it a tactile experience.
- Customizable Colors: Use various yarns to craft trees that match your specific holiday theme.
- Easily Giftable: Create beautiful, portable decorations for friends and family that spread holiday cheer.
What You’ll Need: Materials Table
Before diving into the pattern, let’s gather the necessary supplies for our crochet adventure.
| Item | Recommended Type | Approximate Amount |
|————————–|————————–|——————–|
| Yarn | Various colors | 2-3 skeins |
| Crochet hook | Size G or 4.0 mm | 1 |
| Scissors | Sharp | 1 |
| Yarn needle | Tapestry or darning needle | 1 |
| Stuffing (optional) | Fiberfill or similar | As needed |
Feel free to substitute yarn types, such as using wool instead of acrylic, for a different feel and warmth.
Sizing Guide
This pattern primarily focuses on creating small, decorative trees that can vary in height depending on your crochet technique and yarn choice.
| Size/Height Range | Approximate Measurement |
|————————–|—————————|
| Small | 6 inches |
| Medium | 9 inches |
| Large | 12 inches |
Remember, keeping your gauge consistent will help achieve the desired sizes, so consider making a quick swatch if you’re new to crocheting.
Step-by-Step: How to Crochet the Merry & Bright Holiday Trees Crochet Pattern
Step 1: Start the Base
- Choose your yarn colors based on your holiday theme.
- Prepare your workspace with your yarns unraveled for easy access.
Step 2: Crochet the Core
- Chain 4 and join into a ring with a slip stitch.
- Work 8 single crochets (sc) into the ring.
- Join with a slip stitch to the first sc to close the round.
- Chain 1 for the next round.
- Increase your stitch count by working 2 sc in each stitch around (16 total sc).
- Join again with a slip stitch.
Step 3: Crochet the Shaping
- Optionally stuff the tree for a 3D effect.
- Continue the pattern by working the next few rounds in sc.
- Stuff the tree lightly as you go.
- Shape your tree by working in rounds until you reach your desired height.
Step 4: Add the Finishing Touches
- Finish off the top and weave in any loose ends.
- Skip the next round and begin decreasing.
- Work 2 sc together around until you have a small opening.
- Fasten off using your yarn needle to weave in all ends.
- Create a loop at the top for hanging if desired.
Step 5: Display Your Trees
- Arrange your finished trees on your mantle, tables, or as gifts.
Tips for Clean, Even Crochet
- Maintain tension: Keep your yarn loose enough to work with, but tight enough to prevent gaps.
- Track stitches: Use stitch markers to keep track of your rounds and adjustments.
- Practice swatching: Make a gauge swatch if you’re aiming for a specific size or look.
- Align stitches: Ensure that your stitches are aligned properly to maintain an even fabric.
- Take breaks: Step back and look at your work; it helps to spot any inconsistencies.
Common Mistakes to Avoid
- Skipping rounds — results in uneven height and shape.
- Overstuffing — leads to sagging stitches and distortion of your tree.
- Tension inconsistency — causes irregularity in stitches, making some areas appear loose.
- Incorrect stitch counts — small mistakes can lead to big discrepancies in the final shape.
- Neglecting to weave in ends — can result in unraveling and a messy finish.
Frequently Asked Questions
What is the Merry & Bright Holiday Trees Crochet Pattern?
It’s a crochet pattern designed for creating whimsical holiday trees, perfect for cozy home décor.
What type of yarn should I use?
You can use any worsted weight yarn, though a cotton blend offers a nice drape and finish.
How does this technique differ in difficulty from standard crochet patterns?
It’s quite approachable, using basic stitches like single crochet, making it beginner-friendly.
How much yarn do I need for each tree?
Typically, about 50-100 yards of yarn will suffice for one 6-12 inch tree, depending on your chosen height.
Can I use this technique for other crochet patterns?
Absolutely! The techniques learned here can be applied to create other seasonal and decorative projects.
Conclusion
The Merry & Bright Holiday Trees Crochet Pattern is more than just a craft; it’s an opportunity to weave warmth and charm into this festive season. By following these steps, you can create delightful decorations that not only beautify your home but also serve as heartfelt gifts.
I encourage you to grab your hooks and yarn, dive into this pattern, and share your finished creations with our vibrant crochet community. Happy crocheting, and may your holiday season be full of joy and creativity!